Flightcom 403S Intercom
Advice for installation of a Flightcom 403S
intercom system into a Vans RV-8. Builders of other kitplanes
will also find this useful.
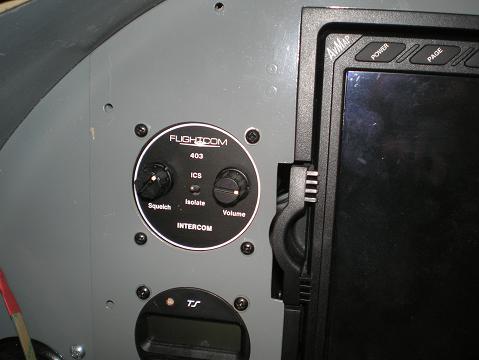
Mechanical
Installation
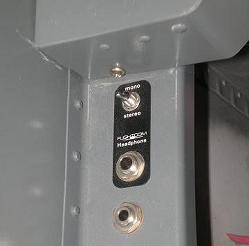 I
decided to install the headphone jacks on the forward ends of the
F-860A-L and F-860C-L armrests. Besides being a convenient
place to plug-in for flying, it made the wiring easy. I was
able to run the wires aft just below the F-860-L armrests though the
holes in the bulkheads. If I could have found rubber grommets
to fit the holes, I would have used them. Instead, I used a
small piece of angle aluminum and an adel clamp to keep the wires from
chafing. This also allowed me to pull the wires tight to keep
them looking good. I was able to use the screw for the angle
aluminum as a ground for the plugs. I
decided to install the headphone jacks on the forward ends of the
F-860A-L and F-860C-L armrests. Besides being a convenient
place to plug-in for flying, it made the wiring easy. I was
able to run the wires aft just below the F-860-L armrests though the
holes in the bulkheads. If I could have found rubber grommets
to fit the holes, I would have used them. Instead, I used a
small piece of angle aluminum and an adel clamp to keep the wires from
chafing. This also allowed me to pull the wires tight to keep
them looking good. I was able to use the screw for the angle
aluminum as a ground for the plugs.
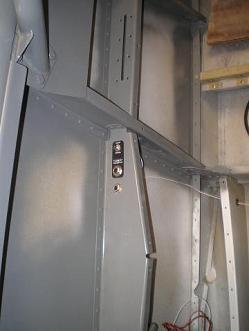
I am used to
having the push to talk on the throttle, see Throttle
Quadrant. In the rear seat I put the push to talk
on the
stick.
Wiring
 I
did as much
wiring as I could on the bench. I measured and cut all the
wires to length, marking them as I went, then soldered the
d-sub connector for the back of the main unit (see
Helpful Hints for Soldering Terminals). I then
pulled
the wires through the left gear box, under the throttle quadrant, and
under the F-860-L armrests. I
did as much
wiring as I could on the bench. I measured and cut all the
wires to length, marking them as I went, then soldered the
d-sub connector for the back of the main unit (see
Helpful Hints for Soldering Terminals). I then
pulled
the wires through the left gear box, under the throttle quadrant, and
under the F-860-L armrests.
Soldering
the jacks wasn’t a lot of fun. I was either sitting in the
bottom of the plane, or leaning over the side working upside
down. Neither was very comfortable.
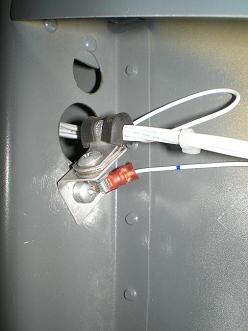
Oops!
I messed up while running the wires to the rear
cockpit, but didn’t notice until I took the above
picture. I had planned on using the top hole for the wires,
and the larger, lower hole that I had drilled for the rear cockpit
throttle linkage. Well, when I ran the wires, I used the
larger, lower hole. Surprise! The throttle linkage
no longer fits.
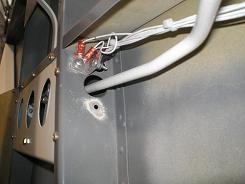 So I
had to rewire the intercom. Luckily, the only wires there
were the ones for the intercom and the rear stick
push-to-talk. I marked the wires and unsoldered them from the
terminals. Then I re-routed then through the correct
hole. An afternoon spent bent over the rail, and I had the
wires soldered back the way they were supposed to go. So I
had to rewire the intercom. Luckily, the only wires there
were the ones for the intercom and the rear stick
push-to-talk. I marked the wires and unsoldered them from the
terminals. Then I re-routed then through the correct
hole. An afternoon spent bent over the rail, and I had the
wires soldered back the way they were supposed to go.
As you can see in the picture, I still need to
repaint where I originally had the grounding screw.
The big lesson learned is to make sure you stick
to the plan, and if there is a spot where there could be confusion,
like which hole to use, write yourself a note.
Testing
Use
a battery or a good power supply to test things out. Don’t
use a trickle charger, you might ruin your electronics.
MP3
Jack
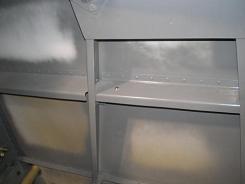 With
the newer intercoms, this is very simple. I installed a
stereo jack from Radio shack in the F-860B-R mid arm rest.
This way, I can plug my iPod or any other music source in, and either
the front or rear cockpit can access it. With
the newer intercoms, this is very simple. I installed a
stereo jack from Radio shack in the F-860B-R mid arm rest.
This way, I can plug my iPod or any other music source in, and either
the front or rear cockpit can access it.
Wiring was
straightforward. Two wires went to the Flightcom,
and one to ground.
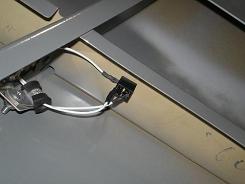 The
Flightcom has a built in
multiplexor that automatically cuts out the MP3 player when the
aircraft radio makes any noise. The
Flightcom has a built in
multiplexor that automatically cuts out the MP3 player when the
aircraft radio makes any noise.
I haven’t built the
holder for the iPod yet. Check back here for an update once I
do.
Return
from Intercom
to Electrical Systems
Return
from Intercom
to Kit Plane Advice Home
|


 I
did as much
wiring as I could on the bench. I measured and cut all the
wires to length, marking them as I went, then soldered the
d-sub connector for the back of the main unit (see
Helpful Hints for Soldering Terminals). I then
pulled
the wires through the left gear box, under the throttle quadrant, and
under the F-860-L armrests.
 I
decided to install the headphone jacks on the forward ends of the
F-860A-L and F-860C-L armrests. Besides being a convenient
place to plug-in for flying, it made the wiring easy. I was
able to run the wires aft just below the F-860-L armrests though the
holes in the bulkheads. If I could have found rubber grommets
to fit the holes, I would have used them. Instead, I used a
small piece of angle aluminum and an adel clamp to keep the wires from
chafing. This also allowed me to pull the wires tight to keep
them looking good. I was able to use the screw for the angle
aluminum as a ground for the plugs.
 So I
had to rewire the intercom. Luckily, the only wires there
were the ones for the intercom and the rear stick
push-to-talk. I marked the wires and unsoldered them from the
terminals. Then I re-routed then through the correct
hole. An afternoon spent bent over the rail, and I had the
wires soldered back the way they were supposed to go.
 With
the newer intercoms, this is very simple. I installed a
stereo jack from Radio shack in the F-860B-R mid arm rest.
This way, I can plug my iPod or any other music source in, and either
the front or rear cockpit can access it.
 The
Flightcom has a built in
multiplexor that automatically cuts out the MP3 player when the
aircraft radio makes any noise.