|
Wingtip Fiberglass

The
biggest thing I can say about the wingtip fiberglass is to take your
time and ensure
everything is positioned correctly before you cut.
I spent a lot of time fitting before I
drilled the first hole.
Prep
I
inserted the aileron jig back into the bellcrank and also
aligned the tooling holes in the wing ribs and ailerons. I used some clamps on the
bellcrank and jig
to ensure the ailerons maintained the proper position.
Once I knew I had the ailerons perfect, I
moved on to the wingtips.
Fitting
First
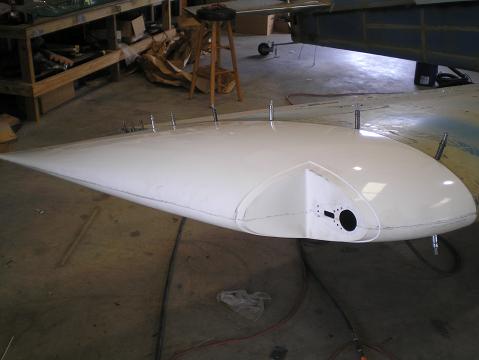
thing I had to do was get the wingtip to slip into the
end of the wing. I
had to sand the end
of the tip at a few spots to prevent it from bottoming out inside the
wing
before the lip was tight to the bevel.
I
also had to do a little fine sanding with a file where the bevel had
gotten
rounded over or where resin had dripped.
Next,
I spent a lot of time wiggling the wingtip until the
trailing edge lined up with the aileron, and the front fit snug inside
the
front curve of the wing. This
took some
doing. I clamped a
couple of bards onto
the top and bottom of the aileron to help hold the tip in position
there. (Kind
of like I did with little strips of metal that I side grip clecoed to
align
metal parts). I had
to use duct tape to
help prop up the middle of the tip, or else when it sagged the front
alignment
was changed. Eventually
I had the right
fit all the way around. The
front curve
was nice, and the trailing edge lined up with the aileron.
I
also had to remove some material from the inside of the aft
end (right next to the aileron.) At
this
point, I removed as little as I could get away with to allow the
wingtip to fit
on.
Tin Canning
That’s
right, I actually had some tin canning on my
wingtip fiberglass. I
used a
heatgun to get the
shape I wanted. Click
here for more on shaping fiberglass with a heatgun.
Drilling
 I
then drilled the holes.
Here is where I had the first problem.
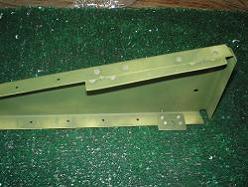
I didn’t have edge distance on the W-412 ribs. So I added some extra
metal strips. I
then drilled the holes.
Here is where I had the first problem.
I didn’t have edge distance on the W-412 ribs. So I added some extra
metal strips.
The
rest of the drilling, dimpling and riveting platenuts
was uneventful.
 After
the wingtip was drilled, and clecoed into position, I
marked and cut the inside aft edges.
I
marked 1/16 inch from the front and trail end of the aileron, then
connected
the dots. I trimmed
off both the
fiberglass and the metal behind it.
This
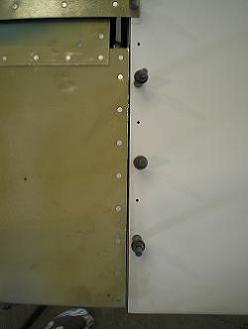
ensured I had a uniform gap between the tip and the aileron. After
the wingtip was drilled, and clecoed into position, I
marked and cut the inside aft edges.
I
marked 1/16 inch from the front and trail end of the aileron, then
connected
the dots. I trimmed
off both the
fiberglass and the metal behind it.
This
ensured I had a uniform gap between the tip and the aileron.
You
can see that the fiberglass tip is a little longer than
the aileron. I will
trim this to final
shape as I do the final prep-work before I paint. Click
here for more my thoughts on final fiberglass work before
painting.
Final stuff
I
also installed the wingtip
antenna and lights
before I screwed the tips on for the last time.
Return from
Wingtip
Fiberglass to Wing
Kit, or to Fiberglass
Return from Wingtip Fiberglass
to Kit Plane Advice Home
|


 I
then drilled the holes.
 After
the wingtip was drilled, and clecoed into position, I
marked and cut the inside aft edges.