Windshield
The biggest thing when working the windshield is
to get the fiberglass as close to the correct shape right from the
beginning. That way you have a lot less sanding to
do. The front and top were pretty straight
forward, unlike the bottom aft ends. Getting them built up
enough to cover the canopy and skirt and still have a smooth transition
back to metal took a lot of work. Here are a couple of tips
that I hope will help with your installation.
Prep and
Paint the inside
 Before
you rivet the windshield onto the frame, paint the inside where
it will be covered by fiberglass. Before
you rivet the windshield onto the frame, paint the inside where
it will be covered by fiberglass.
Cleco the windscreen in position and put the first row of electric tape
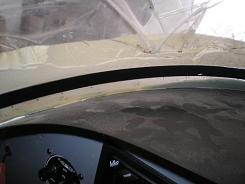
into position for the top of the fairing. Now, while you can
still easily get to the backside of your windscreen, remove it from the
fuselage. Line the inside with tape to
match the outside tape. Sand the bottom below the
tapelines. Then paint the inside of the bottom of
the windshield. This will give you a nice finished look from
the inside while flying. Instead of staring at the back of
the fiberglass, you will see pretty paint.
Unfortunately for me, I didn’t think of this before I
finished the fiberglass. So now I will have to figure out a
way to finish the inside of the windscreen without making a mess on the
good Plexiglas or the glareshield.
Canopy to
Windshield Fairing
I prepared for this fairing by covering the front of the canopy and
skirt with wide electric tape. Then I waxed the top of the
tape, and slid the canopy closed.
I initially put two or three layers all the way around the windscreen,
including over the top and the forward edge of the canopy. I
also made sure the fiberglass continued down to the bottom of the
canopy skirt, but didn’t worry about the fact that is
wasn’t a smooth transition yet. After it dried, I
worked the canopy loose using a chip chaser to slide below the new
fiberglass to pop it free from the canopy.
 Once
it was free, I slid the canopy out of the way, and from this point
on, built up on top of the layers. I would slide the canopy
back into position to give the fiberglass some support while I sanded. Once
it was free, I slid the canopy out of the way, and from this point
on, built up on top of the layers. I would slide the canopy
back into position to give the fiberglass some support while I sanded.
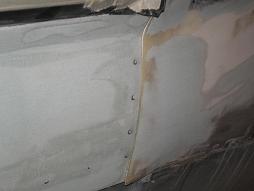
I built the front and bottom of the windscreen until I had the smooth
transition to metal all the way around. At the bottom of the
sides, I expanded the fiberglass section until it was even with the
bottom of the canopy skirt, and filled the low spot with micro balloons
and cloth.
By using the canopy and the skirt as the “mold” for
the fairing, I got a good fit. I eventually cut the back of
the fairing to make it about 2 ½” wide
across the top of the windscreen and canopy. I built up
enough layers of fiberglass to give me 1/8” thickness.
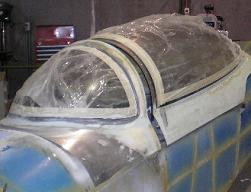
 In
this last picture, you can see the area I extended the fiberglass on
the bottom of the fairing and the trimmed rear of the windshield
fairing. You can also see the forward lip of the canopy that
I fiberglassed and will paint. I think it helps
finish the front of the canopy, and it also hides the repairs from the
bad drill bit. Click
here to read more. In
this last picture, you can see the area I extended the fiberglass on
the bottom of the fairing and the trimmed rear of the windshield
fairing. You can also see the forward lip of the canopy that
I fiberglassed and will paint. I think it helps
finish the front of the canopy, and it also hides the repairs from the
bad drill bit. Click
here to read more.
Finishing
Touches
I still have a little more work to do on the fiberglass. I
have a few low spots that need filling. But I
wasn’t going to mix up a batch of resin just to fill the
little spots. I will wait until I work the next piece of
fiberglass. While I have resin mixed for it, I will come back
and fill the low spots of the skirt and fairing. Then once
all the low spots are filled, I will finish up with a couple of layers
of just resin to get that smooth finish.
Return
from Windshield
to Finishing Kit
Return from Windshield to Kit Plane Advice Home
|


 Before
you rivet the windshield onto the frame, paint the inside where
it will be covered by fiberglass.
 In
this last picture, you can see the area I extended the fiberglass on
the bottom of the fairing and the trimmed rear of the windshield
fairing. You can also see the forward lip of the canopy that
I fiberglassed and will paint. I think it helps
finish the front of the canopy, and it also hides the repairs from the
bad drill bit.