

Vertical Stabilizer
The vertical stabilizer is built in much the same way as the horizontal stab. If you haven’t read that page yet, click here to read it. The same techniques apply to the vertical stab. Again, I found laying the VS-803PP rear spar flat on the horizontal bar of the jig and drilling right into the wood an easy way to hold the pieces steady while I worked on them.
As before with the horizontal stab, clamping during riveting is critical. Before the VS-803PP is clecoed in place, it is easy to clamp the skin to the workbench. After clecoing the VS-803PP, either squeeze the rivets, or clamp the stab with the rear spar hanging off the end of the bench.
Attachment Photos Front
Attachment
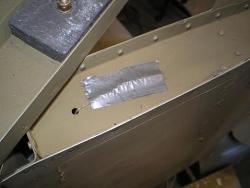
Rear Attachment
Lower Rear Attachment
Next, read the Rudder section.
Return from Vertical Stabilizer to Tail Kit Return from Vertical Stabilizer to Kit Plane Advice Home |

 Before
you rivet the skeleton of your vertical stab together, think about your
electric system.
Before
you rivet the skeleton of your vertical stab together, think about your
electric system.

