Taxi and Landing Lights
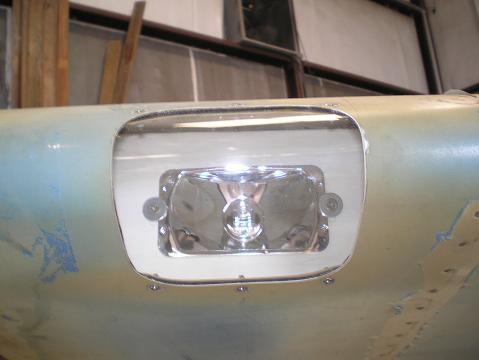
Vans makes this
combination taxi, landing lights kit for all
of their aircraft. The
bracket that
holds the light is made to fit the width between Vans wing ribs. With just a little work,
it could be made to
fit any metal skinned aircraft.
This
was a compete kit, and very easy to install.
The directions that came with it were easy to
follow. I did all
of the fitting before
I riveted the front of the wing together.
This let me cleco the parts together when I
needed the shape of the wing
for fitting, and let me pull everything apart for access when I was
ready to
cut and smooth.
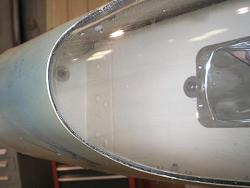 I
started by marking and cutting the holes in the leading
edges of the wing skins. Be
careful
here, even though I measured twice and cut once, I still messed it up. The hole isn’t centered
between two ribs; it
is offset a little to one side. I
offset
both holes to the left the first time.
This meant that when I installed the wings the
lights wouldn’t be
symmetrical. I
probably could have left
it, and very few people would have noticed, but I couldn’t live with it. So I ordered another wing
skin and did it
again. Talk about
frustrating! I
started by marking and cutting the holes in the leading
edges of the wing skins. Be
careful
here, even though I measured twice and cut once, I still messed it up. The hole isn’t centered
between two ribs; it
is offset a little to one side. I
offset
both holes to the left the first time.
This meant that when I installed the wings the
lights wouldn’t be
symmetrical. I
probably could have left
it, and very few people would have noticed, but I couldn’t live with it. So I ordered another wing
skin and did it
again. Talk about
frustrating!
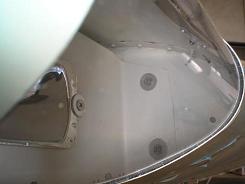 I
cut the holes with a cutoff disk, then spent some time
with files and Scotch-Brite disks to smooth the edges.
I then clecoed the parts back together and
did all the fitting and drilling for the brackets.
I think the biggest advantage of doing this
before I riveted the parts together was when it came time for the
plexiglass. It was
pretty easy to reach in from the side
or back and hold the plexiglass in position.
I think it would have been a lot harder to do
in a built wing. I
cut the holes with a cutoff disk, then spent some time
with files and Scotch-Brite disks to smooth the edges.
I then clecoed the parts back together and
did all the fitting and drilling for the brackets.
I think the biggest advantage of doing this
before I riveted the parts together was when it came time for the
plexiglass. It was
pretty easy to reach in from the side
or back and hold the plexiglass in position.
I think it would have been a lot harder to do
in a built wing.
The bracket has two
angles to set the lights. One
is for taxi and the other for landing if
you have a tail dragger. For
the
tricycle gear, you probably only need the one setting.
Since I’m building an RV-8, I set one light
to each angle.
When I marked and drilled
my holes to attach the plexiglass to the wing skin, I didn’t put the
foam
between them. This
made the final
installation a little tough, but everything fit.
Only time will tell if there is too much
stress on the plexiglass because of this.
I hope I don’t get cracks at the screw holes.
After everything was
drilled, I primed the parts, then painted
the bracket and the insides of the wings around the landing lights
white. I figured
this would reflect better and
provide better lighting than leaving them primer green.
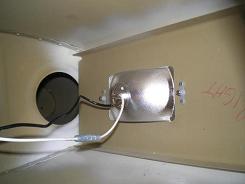 The
wiring was straightforward. Power
goes from the battery, through a
circuit breaker and switch, then through the wing conduit to the lamp. The ground is connected to
the wing tip. I
have a separate circuit for each
landing light. They
each have their own
breakers, wires and switches. I
put the
two switches sitting next to each other on the throttle quadrant panel
with the
left one going to the left wing and the right one to the right wing. The
wiring was straightforward. Power
goes from the battery, through a
circuit breaker and switch, then through the wing conduit to the lamp. The ground is connected to
the wing tip. I
have a separate circuit for each
landing light. They
each have their own
breakers, wires and switches. I
put the
two switches sitting next to each other on the throttle quadrant panel
with the
left one going to the left wing and the right one to the right wing.
What I Would do Different
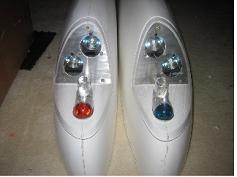 When
I built my wings, Vans did not offer the LL 7/8 MR-16, RV-7/8 Wing
Tip Landing Light Kit. If I had the option, I would
look into this all in one system. It would probably be
cheaper, lighter, and easier/quicker to install than using the two
separate landing/taxi lights and wing tip lights. When
I built my wings, Vans did not offer the LL 7/8 MR-16, RV-7/8 Wing
Tip Landing Light Kit. If I had the option, I would
look into this all in one system. It would probably be
cheaper, lighter, and easier/quicker to install than using the two
separate landing/taxi lights and wing tip lights.
Return
from Taxi and Landing
Lights to Electrical
System
Return
from Taxi and Landing
Lights to Kit
Plane Advice Home
|


 When
I built my wings, Vans did not offer the LL 7/8 MR-16, RV-7/8 Wing
Tip Landing Light Kit. If I had the option, I would
look into this all in one system. It would probably be
cheaper, lighter, and easier/quicker to install than using the two
separate landing/taxi lights and wing tip lights.
 I
started by marking and cutting the holes in the leading
edges of the wing skins.
 I
cut the holes with a cutoff disk, then spent some time
with files and Scotch-Brite disks to smooth the edges.
 The
wiring was straightforward.