

Forward Upper FuselageBefore you start assembling the forward upper fuselage of your RV-8, do as much of the work that it will cover as you can. Have you drilled and fit the rudder pedals? What about the fuel lines and vent lines? And the biggie, have you done a lot of wiring yet?
If
I
were able to do it again, I would run a lot of wires before I riveted
on the forward upper fuselage skin. You can run the wires
from
the firewall to the right console, from the console across the F-802N
to the left side, from the top of the left gear box to the left panel
(if you have one), and from the top of the gear box to below the mid
cabin cover. If you use my suggestion in Wiring
Panel you can do all the wiring now while everything
is easy to access. Since you will be making connections at
the top of the gear box, you can measure the length of each wire from
there to the correct component. Later when the panel is
built, you can make the wires to connect the panel to the top of the
gear box. This will save you weeks of crawling under your
panel. 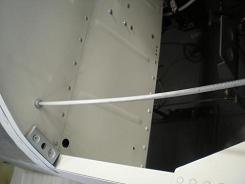
I
found that as soon as I removed the piece of the skin covering the door
hole, the firewall was free to move too much, and I couldn’t get a good
fit for the door. So I added a threaded rod to hold it stiff
until I finished the assembly. Make sure you put the rod low
enough so it does not interfere with the door.
You will be making the latch to secure the door in this section. The F-873L lock arm needs to be fit to the lock you buy. I would suggest that you purchase your lock before you build this part. My lock had a square center, so the hole in the middle of the F-873L needed to be square. This was much easier to do on the bench. Plus, as you fit the door, you have the final lock assembly fit at the same time, and you can make everything as tight a fit as possible to the forward upper fuselage skin. I
know the new match drilled
kit is pretty good, and allows everything to stay true, but I think I
would be a little cautious about assuming the baggage door will fit by
just drilling the matched holes. I think I would cleco the
entire door assembly together, then final drill just the top skin and
skeleton. After dimpling and priming, I would back rivet the
F-873E & F, and rivet the F-873B & C to the F-873A top
skin.
I would cleco the bottom skin on, and lay the door assembly in place on the fuselage. At this point I would tweak anything that needs moving to get a good fit all the way around the door. The door skin for the older kit didn’t always fit perfectly into the hole in the skin. At this point, I had to file the edges of the door to get a good fit with an even gap between the F-873A baggage door skin and the F-821 forward upper fuselage skin. In the first of these three pictures, you can see the little black lines on the edges of the door in the picture. These were my marks to show where the door was overlapping or too close to the F-821 skin. They let me remove the door and still know where to file the skin. After everything fits nicely, I would tape the door down or use two cargo strap type clamps around the fuselage to pull it tight and hold it in place. 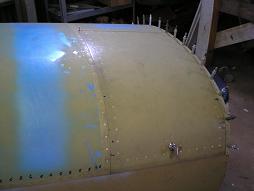 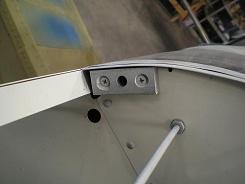 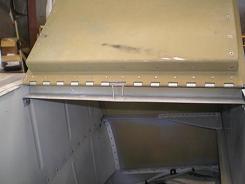 Finally from the inside, rivet the bottom skin to as many holes as you can reach, starting from the center of the F-873B & C and working to the ends. Again, I would only remove one cleco at a time as I riveted. Remove the door and finish riveting what you could not reach from inside. I know it sounds like a few extra steps, but I think there is too much play in the parts to assume that the predrilled holes will match everything up. After the parts are drilled and dimpled, they won’t want to move when you try to tweak the door into shape. The dimples will cause the bottom skin to slide back to where it was. 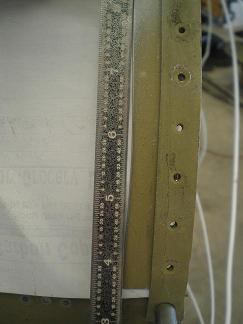
After
everything was
installed, I found that the F-821B support strips interfered with the
F-873K latch pins, even when the pins were fully retracted into the
door. So I had to file a little off of the inside lip on both
of the F-821B strips. I filed enough to let the F-873K pins
clear, then smoothed out the divot in the F-821B strips.
The old directions don’t show the foam strip to keep the moisture out, so I would be interested in seeing what others have done to waterproof their front baggage door. Return from Forward Upper Fuselage to Fuselage Return from Forward Upper Fuselage to Kit Plane Advice Home |